Webhooks configuration
Webhooks allow you to send data to your Home Assistant instance via Home Assistant Cloud. It integrates with the Home Assistant webhook support, which can be used to trigger automations, send location data with OwnTracks, and much more.
Guides:
Presence detection with OwnTracks
OwnTracks is an application for iOS and Android that allows your phone to report information securely and directly to Home Assistant. This guide will show you how to set it up with Home Assistant Cloud webhooks. To get started, we’re going to follow the Home Assistant instructions to configure OwnTracks. To get started, go to Configuration -> Integrations, and under OwnTracks click Configure.
The instructions on the screen will guide you to install the application and configure OwnTracks to use Home Assistant.
Once configured, we’re going to the Cloud panel (Configuration -> Cloud) and scroll down to the webhooks cards. It will now have a new entry for OwnTracks. Enable the webhook by clicking on the toggle. You will be presented with a webhook info dialog with a new cloud accessible url. Copy the new cloud url to your mobile phone and enter it in OwnTracks.
If you prefer video over words, JuanMTech has made this awesome video describing the whole process and what else you can do with OwnTracks and Home Assistant:
Triggering automation with a webhook
This tutorial will guide you through the creation of an automation powered by a webhook. We will be able to trigger this automation from anywhere in the world and use the data in the trigger.
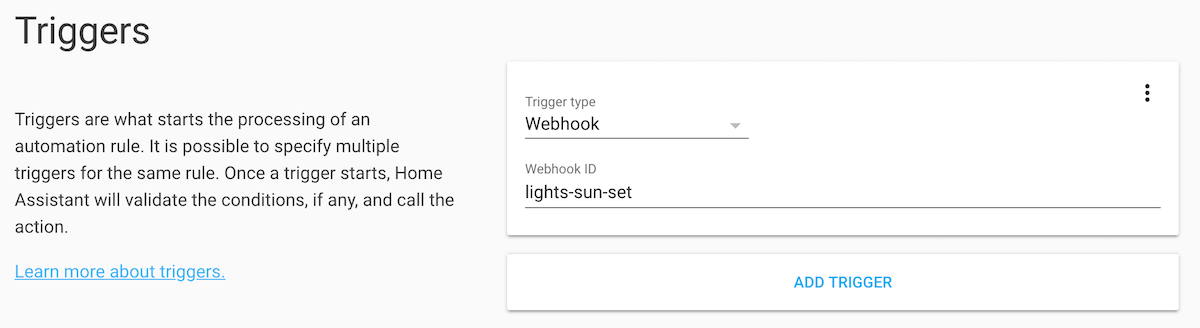
Go to configuration -> automation and create a new automation. For trigger, from the dropdown click “Webhook”. For Webhook ID, enter a few words as an identifier. It doesn’t matter what you enter here, as long as it is unique from other webhooks that you will create. For example, enter “hello-world”.
To finish the automation, let’s pick for action “Call Service” and set the service to “light.turn_on”.
Click on the orange save button in the bottom right. Your automation is now created.
Now go to configuration -> cloud and scroll to the webhooks card. You will now see that your newly created webhook is available.

Click the toggle to enable the webhook to be accessible via the cloud. A dialog will open that will show you a unique URL that you can use to trigger your automation. If you’re on Linux or Mac, you can test it out with the following commands:
curl -X POST <the webhook url>
Form data or JSON data sent to the webhook endpoint will be available to templates in your automation as trigger.data or trigger.json.
